Six Opinionated Tips to be a Better .NET Developer
Tis the Season
I am humble to be a part of the [2nd Annual C# Advent Calendar](https://crosscuttingconcerns.com/The-Second-Annual-C-Advent ). Thank you to everyone who helped put it together and contributed. My blog post is hopefully a fun one not to be taken too seriously. I have been a developer for over 10 years, and I am always looking at new ways to be more productive. May I present you with 6 tips that I have started to adopt that I think have increased my developer skills 1000% (YMMV).
1. Make the CLI your Best Friend
I will shout it from the rooftops, **I LOVE CLIs!!!** I just find the process of working in the command line a far more efficient experience than the IDE in certain scenarios. Being a .NET developer, it is obvious I would gravitate towards the [.NET CLI](https://docs.microsoft.com/dotnet/core/tools/) to kickstart my development experience.
The main benefit to using .NET CLI is getting started with writing .NET Core applications, with a few commands, you can have a template app created and running locally.
```csharp dotnet new webapi -o TestApi dotnet run ```
Running that serves up a kestrel instance of the default WebApi template, with no IDE required. Extending this further, we can `watch` on the same command and it will re-run the `run` command whenever a file changes in the project.

That is pretty cool! There are some really cool things you can do with the CLI, but there are also some very important things you can do as part of SDLC with CLI tools. Using the .NET CLI to build, test, and publish your applications is super easy, especially if you use an ALM tool where you can control the configuration of your build environment.
One amazing additional thing to consider with the CLI is the extension capabilities. [Global Tools](https://docs.microsoft.com/dotnet/core/tools/global-tools) are custom developments that can be downloaded via nuget and are executed via the command line. You can use global tools to build custom demands for functions that as a developer we tend to do repetitively. How about being able to get a random blog post in infamous [cowsay](https://www.nuget.org/packages/dotnet-cowsay/) format. (**Full disclosure, I wrote this, disregard the shameless self-promotion**).
There are tons of useful global tools available developed by Microsoft or the community, take a look at some of them [here](https://github.com/natemcmaster/dotnet-tools). I highly encourage folks to use the CLI as much as they can, who knows you might become someone who never opens Visual Studio again! (not advocating that, VS is awesome)
## 2. Use Application Insights for Local Development
Application Insights might be my favorite tool of all time. Any opportunity I have to bang the drum and promote it I am there. I talk to my customers about it, and I speak about it at community events and conferences. The number one misconception people have about Application Insights is that you can only use it if your app is in Azure. That is simply not true! Sure, Application Insights is a first-class citizen in Azure, but you can host your apps in other Cloud Providers or even On-Premises and still get the benefit. Actually, you don't even have to deploy your app to see the capabilities of Application Insights.
Application Insights is simply a REST service with a SDK that batches telemetry and pushes it to the Api, so you can leverage the full power of App Insights while working locally. The easiest way to get Application Insights is within Visual Studio by adding a Connected Service. Do this by Right-clicking on your project and select Add > Application Insights Telemetry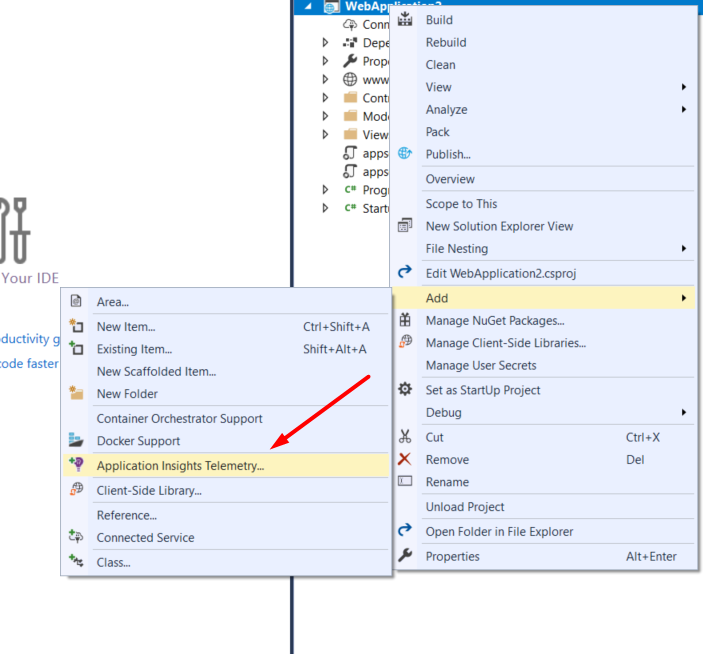
From there, you will be prompted with a wizard to walk-through setup of the Application Insights resource. From here, you can elect to just install the SDK on your app, which does nothing in Azure, but allows you to see what kind of data will be sent to the Api if you decide to use it.
Once you complete the wizard, you will have the SDK from nuget installed into your app, and the necessary changes added to your app to utilize the SDK. If you start your application, you will see a new Application Insights button appear in Visual Studio when you are in debug mode.
This is a built in Application Insights viewer that allows us to see what kind of telemetry our application tracks, with filtering and other features included. This is a powerful experience that is great for getting a first taste of Application Insights. If you like what you see, I highly recommend using Application Insights for your applications, as it a great experience at a very good price point.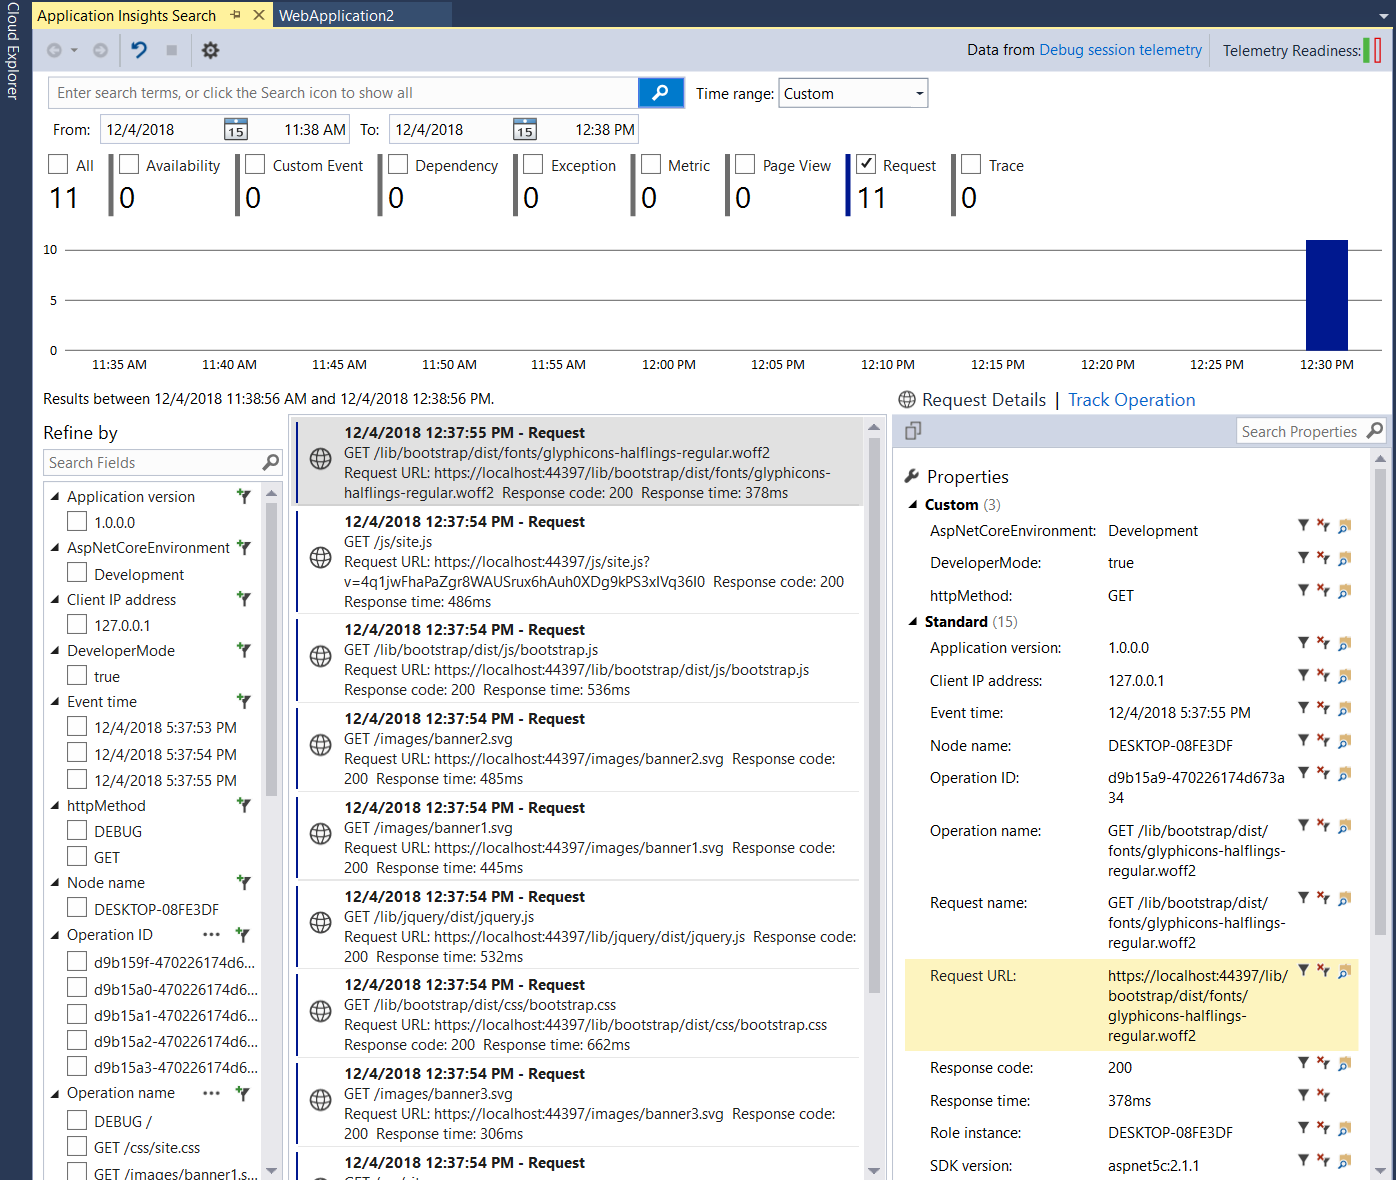
3. Use Tuples, but not too much
If you didn't know about Tuples, you should! Tuples were revamped in C# 7.0 and provide a rich experience around storing more than just one element when creating a class or struct seems like overkill. Consider the following scenario
```csharp public static void ReturnMinAndMax(IEnumerable
In the above scenario, we want to get access to the Min & Max and return. In the past we would create a class or struct with 2 members, and return a new instance of that type from our method.
```csharp public class MinMax { public int Min {get; set;} public int Max {get; set;} } public static MinMax ReturnMinAndMax(IEnumerable
There are a few issues here, biggest being that you have to create and manage a type solely to return a value from a method. This is a waste of your time, plain and simple. You can instead return a Tuple from your method like so
```csharp public static (int Min, int Max) ReturnMinAndMax(IEnumerable
And extracting the field is as simple as
```csharp (int min, int max) = ReturnMinAndMax({4,5,6,9,15}); ```
That is pretty cool. All you need to do to use this sweet feature is make sure you are using version 7.0 of C# (you can do this in csproj or Project Properties). You will also need to get a nuget package as well (it may be already there depending on your app type) called [`System.ValueTuple`](https://www.nuget.org/packages/System.ValueTuple/). With this new power comes great responsibility. Leaning on Tuples too much can lead to code that can be hard to manage (especially if you are using a similar Tuple in multiple places). There are many scenarios when you want to use a class or struct, such as
- You want to serialize the values in some way
- You may want to use the .ToString() extension on your type
- You need scopes on members (i.e. protected, internal)
I highly recommend you take a look at the full spec for [Tuples on docs.microsoft.com](https://docs.microsoft.com/dotnet/csharp/whats-new/csharp-7#tuples) to get a firm understanding
## 4. Use Breakpoints For More than Stepping
Sometimes debugging can be a PITA. How many times have you been debugging and you added code to check for a particular value or even worse, putting breakpoints in your code and hitting F5 over and OVER AND OVER AGAIN!!! This is terrible experience for developers and quite frankly I didn't know there were other options. I recently realized that you can use breakpoints to print to Output and on top of that, based on a particular condition. For instance I have this awesome code here
```csharp Random r = new Random(); while (true) { var next = r.Next(10); } ```
If I want to "check" the value of next, I could add some logic to my code
```csharp Random r = new Random(); while (true) { var next = r.Next(10); if (next > 5) { var temp = ""; //added to see value of next } } ```
This is not ideal for a few reasons, most noticeably I am adding code as part of my debugging practice, which if checked in is not good. I can also add a breakpoint and F5 till my hand cramps, YUCK! Better yet, I can add a breakpoint and set Actions and Conditions to do what I want and just observe the Output window.
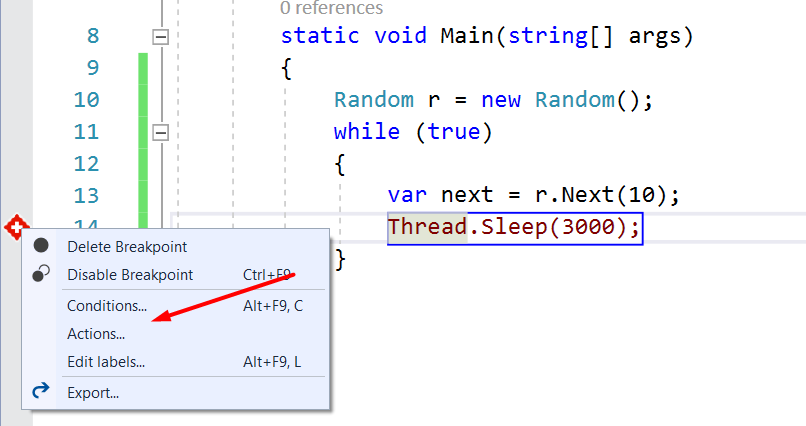
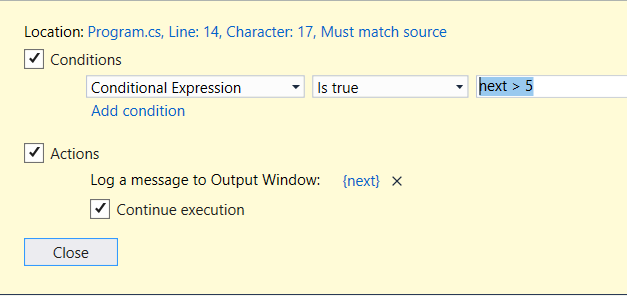
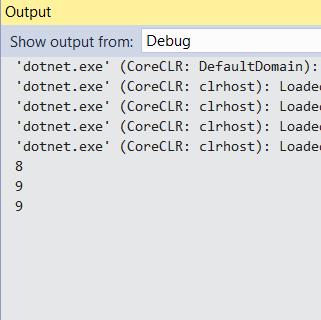
Best part of this is that my app can continue to run, since I have the `Continue Execution` box checked and I am still able to see Output. Unchecking that box will stop on the breakpoint if the condition is met, pretty cool!!!
5. The .NET CLI can help troubleshoot startup errors
Have you ever seen this after deploying your ASP.NET Core application to your target server?
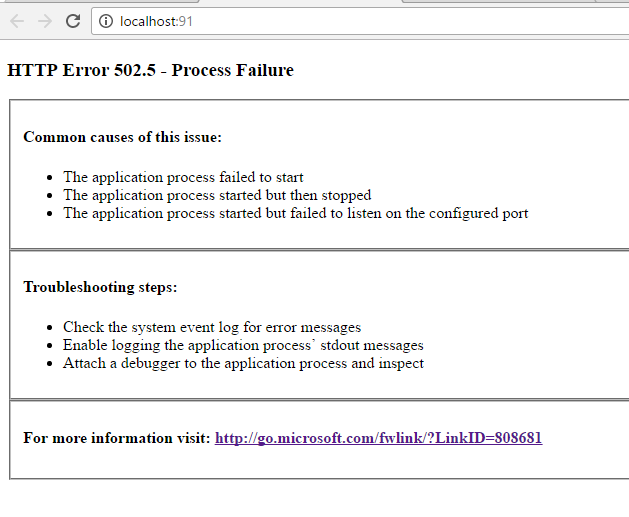
This error is a bummer, because it usually means there was an unhandled exception before your application entered it's startup process (aka all the middleware). This means more than likely, there are no logs (or very sparse ones) and no real way to discern what caused the app to fail. There is a very easy solution, especially since you already have the .NET Core Runtime installed on the target machine. Since the output of .NET Core apps is a dll, you can point the `dotnet` app host (the thing that runs .NET Core apps) to that published dll from the command line and see what the actual exception was. This will work with any app i.e. console, UWP, web or even Tizen apps!

Having this tool in your tool belt will help you get out of a jam where you have no exception detail, no logs, and no flippin' clue what to do next.
## 6. Don't forget to decompile your sources
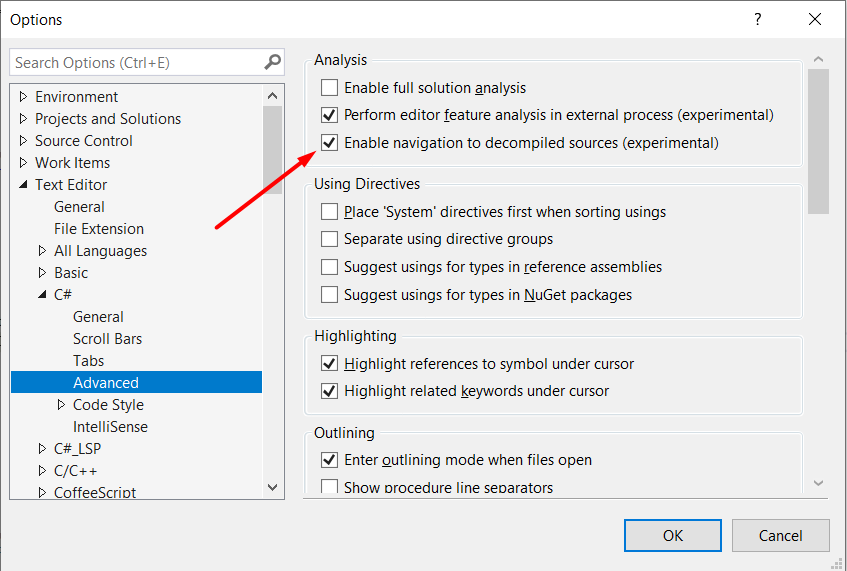
Gone are the days of having to jump through MANY hoops to figure out what referenced libraries in our applications do. Using version 15.8 of Visual Studio 2017, there is a setting labeled `Enable navigation to decompiled sources.` which is set by directing to Tools > Options > Text Editor > C# > Advanced
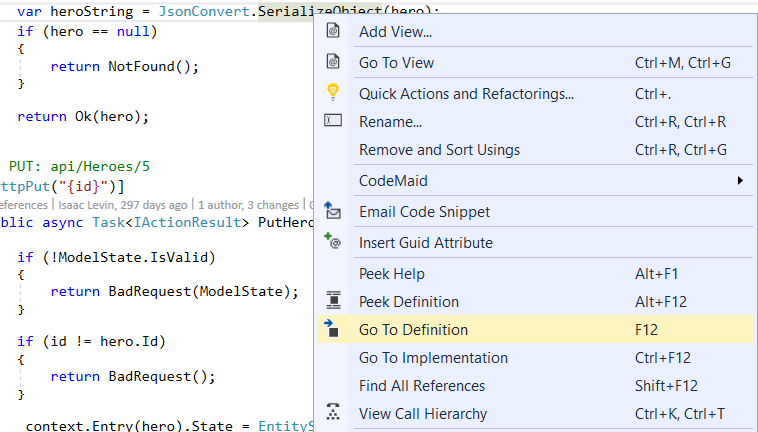
Enabling this feature allows the viewing of metadata related to the library in question. If the developer of that library has configured metadata, you will be able to see a decompiled view of the definition using ILSpy. For instance if we wanted to view decompiled sources for well known library [Json.NET](https://www.newtonsoft.com/json). First we will right-click on a method we want to see the definition.
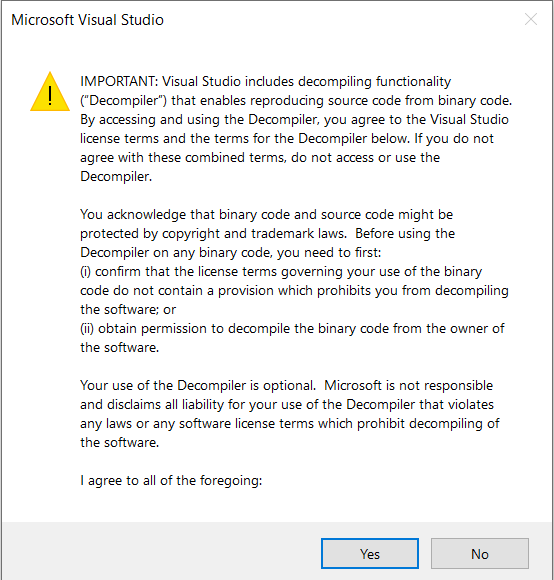
We will than see a message stating the Terms & Conditions of the feature and after clicking `Yes`
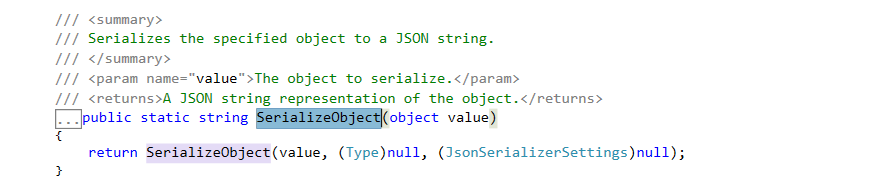
We see the decompiled source for the method in question, pretty cool huh!
## Thank you and Take Care!
Thanks for reading the post, and be sure to check out more from the [2nd Annual C# Advent Calendar](https://crosscuttingconcerns.com/The-Second-Annual-C-Advent) by following [#csharp](https://twitter.com/hashtag/CSharp) and [#csadvent](https://twitter.com/hashtag/csadvent) on Twitter.